So the rust repair. This is a bit of this build I did not enjoy much at all. Initially when I cleared off the sound padding, I believed it may be possible to just replace sheet metal on the floor in localized areas, then thoroughly clean the rest, rust convert it and give the whole floor a layer or two of GF matting and resin. It strengthens up the whole monocogue in any case (guys who followed drag racing back in the 1990's might remember Sybie Coetzee's very quick red and later orange Datsun with the turbo/Nos V6. He did just that to strengthen the floor and it worked). The 'only' really bad bits was that front right area and also the valleys in the rear footwells. Valleys as in the bottoms of those indentations.
But then that hole appeared in the chassis beam as it goes up to the engine bay area. It might have always been there, but I then crawled in under the car with pliers, hammer and screw driver to go check the rest of the beams and found that although they mostly looked really good from the outside, it was just a very thin skin on the outside that somehow retained its good looks. Inside it was rotten. Also, there was not one section where it was good on both sides of the car. I probably have mild OCD, but the idea of one half a repair and the other original would drive me nuts, so it all had to go.
After probably another 2 weeks of procrastinating, wondering, asking for ideas, one day after work I decided to just go and cut it all out and take it from there.
- Photo0903.jpg (65.86 KiB) Viewed 3665 times
I did take out that back bit first, just in case I make a mess, it would be the easier one to fix. But, in for a penny, in for a pound, no point wondering any more.

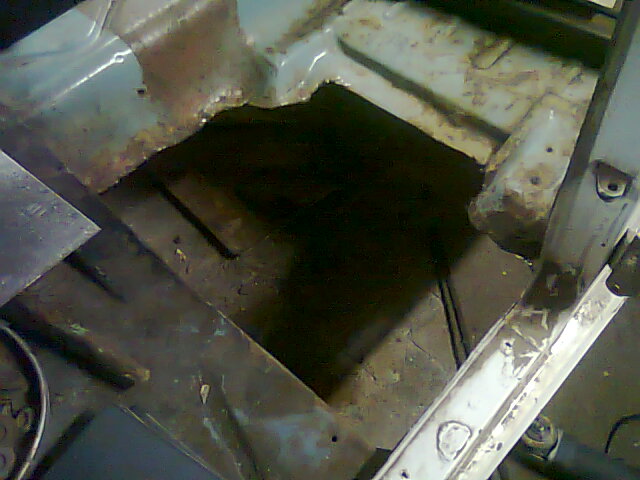
- Photo0905.jpg (86.97 KiB) Viewed 3665 times
Front out. On the floor next to the car is the bit chopped out and one can clearly see just how bad the beams and floor panel had rusted.
There was a pause here in the project. I wanted to see (although I had very little hope of success) if I could find a donor car being chopped up anyway to get a good floor out of. No such luck, the few that were bad enough to chop up had floors even worse than mine. I had a look at some other cars to try and find something one could make fit. I gave up on that idea, again he cars in my area (Western Cape) getting chopped are rusted. Scrappers were not much help either, in any case more modern cars have floors of a quite different size and shape, so it would be too messy. I did, for about 10secs, think about trying to source replacement panels from UK or such, but the cost just cannot be justified for this type of project. Perhaps a nuts and bolts concourse type restoration yes.
So, I set about getting materials together to fabricate replacement parts. Don't set your sights too high, I am not one of those highly skilled guys who can shape sheetmetal into the OEM shapes, this was going to be a lot more brown beef stew than fillet mignon.


